Should You Wrap Flowers from Your Garden Before Giving Them?
Contents:
- Why Presentation Matters with Garden-Cut Flowers
- Wrapping Garden Flowers as a Gift: When It’s Worth the Extra Step
- Casual Drop-Offs and Neighbor Gifts
- Birthday, Get-Well, or Celebration Bouquets
- Wedding or Event Arrangements
- Best Materials for Wrapping Garden Flowers
- Step-by-Step: How to Wrap a Garden Bouquet
- Common Mistakes to Avoid
- Color and Seasonal Pairings That Photograph Well
- Frequently Asked Questions
- Do you have to wrap flowers when giving them as a gift?
- How do you keep garden flowers fresh when wrapped as a gift?
- What is the best paper for wrapping garden flowers as a gift?
- How early can you cut and wrap garden flowers before giving them?
- Is it okay to give flowers without a vase?
- Your Garden Deserves to Be Shared
You’ve grown something beautiful. The dahlias are finally blooming, the sunflowers are standing tall, and you want to cut a bouquet for someone special — but now you’re standing in your kitchen wondering: do I just hand these over, or does wrapping matter? It’s one of those small decisions that can feel surprisingly tricky. The good news? There’s no single right answer, but there are definitely better choices depending on your situation.
Wrapping garden flowers as a gift is more than just aesthetics. Done well, it protects the stems, keeps the flowers hydrated longer, and signals that you put genuine thought into the gesture. Done poorly — or skipped entirely — it can make even a stunning bouquet feel like an afterthought.
This guide walks you through when to wrap, what to use, and how to make your wrapping garden flowers gift look like it came from a boutique florist, not a rushed last-minute grab.
Why Presentation Matters with Garden-Cut Flowers
Store-bought flowers come pre-arranged with professional wrapping. Garden flowers don’t. That means the presentation is entirely on you — and that’s actually a gift in itself. A hand-cut bouquet from a home garden is more personal than anything from a grocery store floral department. But without some thoughtful presentation, that specialness can get lost in translation.
Studies on gift perception consistently show that presentation influences how recipients emotionally value a gift, even when the contents are identical. One oft-cited finding from consumer psychology research suggests that gifts wrapped with care are rated significantly higher in perceived thoughtfulness than unwrapped ones — sometimes by as much as 30%. A little kraft paper and twine can do a lot of emotional heavy lifting.
Beyond perception, wrapping serves a functional purpose. Cut flowers lose moisture fast. A loose stem wrap, even just damp paper towels secured with a rubber band and covered in foil, can extend viability by 2 to 4 hours during transport — enough time to get across town and still look fresh when they arrive.
Wrapping Garden Flowers as a Gift: When It’s Worth the Extra Step
Not every situation calls for an elaborate wrap job. Here’s a simple way to think about it:
Casual Drop-Offs and Neighbor Gifts
Handing a neighbor a loose bundle of zinnias over the fence? Totally fine. A simple twist of twine around the stems, maybe a leaf or two tucked in for texture, is enough. This keeps it feeling relaxed and genuine rather than fussy. The gesture is what counts here.
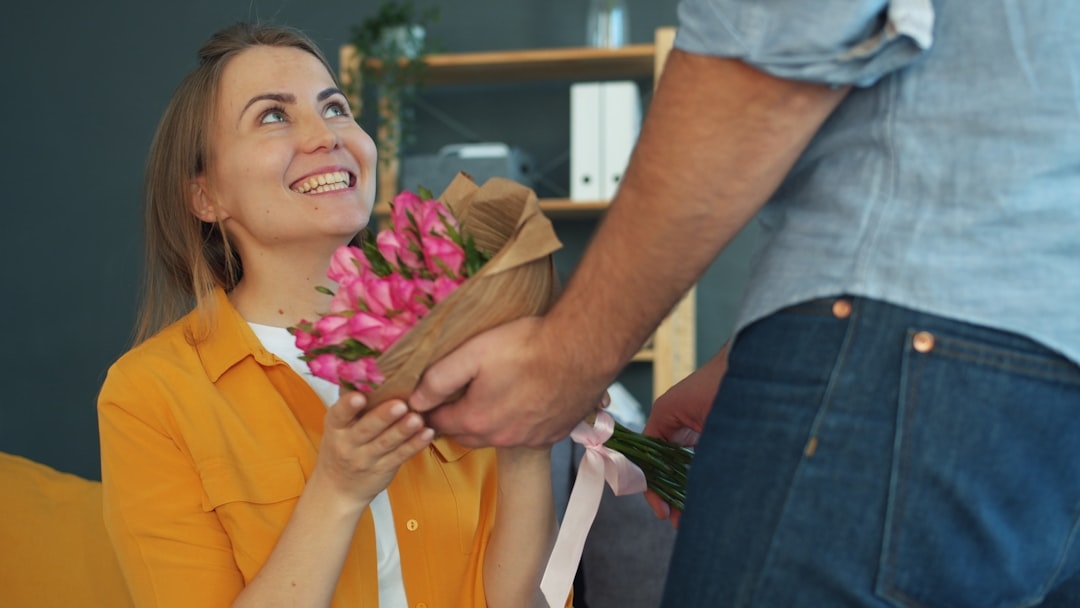
Birthday, Get-Well, or Celebration Bouquets
For any occasion that carries emotional weight, take the extra 10 minutes to wrap properly. Use kraft paper or tissue paper, add a layer of cellophane if you’re transporting them more than 15 minutes, and secure with ribbon or natural twine. Consider a small card. These details collectively elevate a handful of garden stems into something that feels intentional and celebratory.
Wedding or Event Arrangements
If your garden flowers are going to a wedding or formal event, presentation is non-negotiable. Floral stem tape, waterproof floral foam, or a water-filled floral tube inside the wrap will help the flowers survive a full event day. At minimum, wrap in tissue and cellophane with the stem ends in a damp paper towel enclosed in foil.
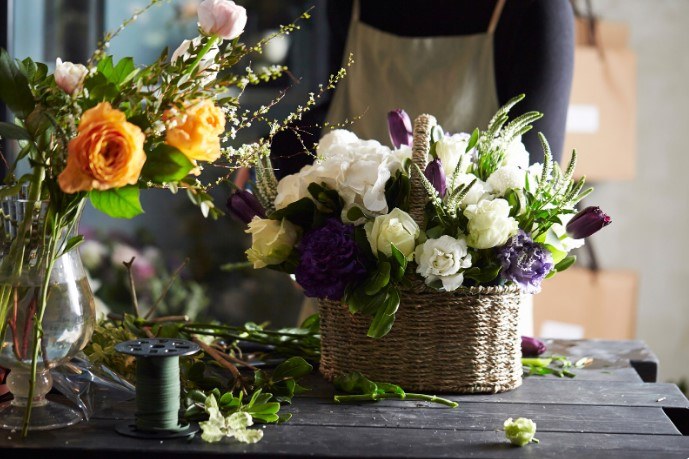
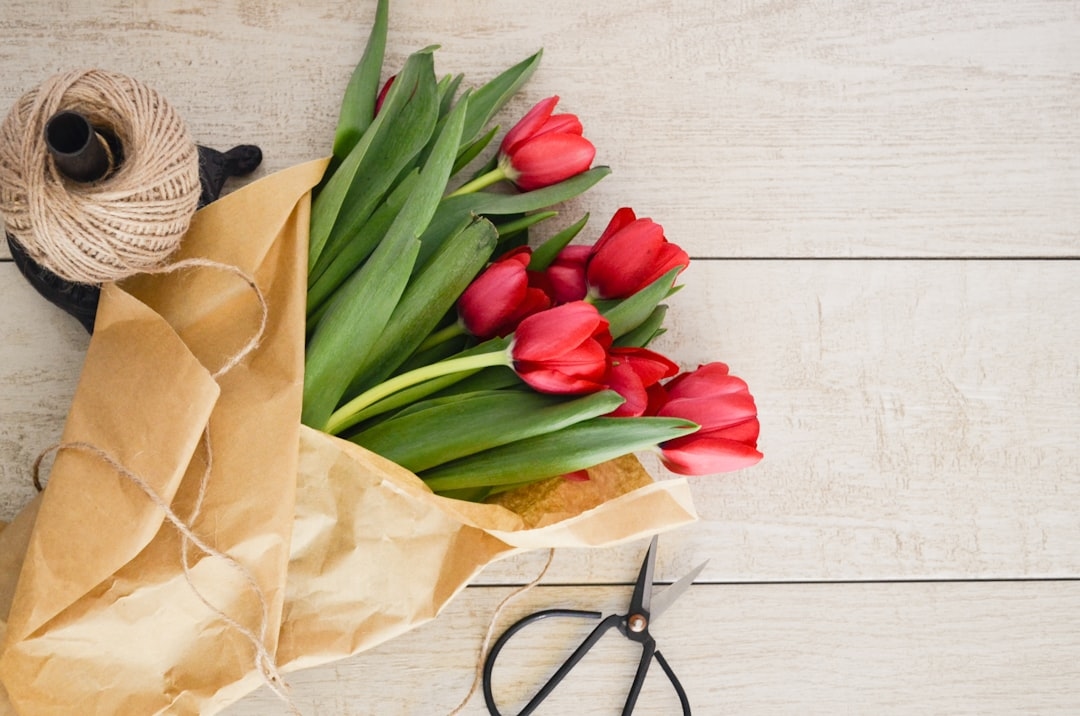
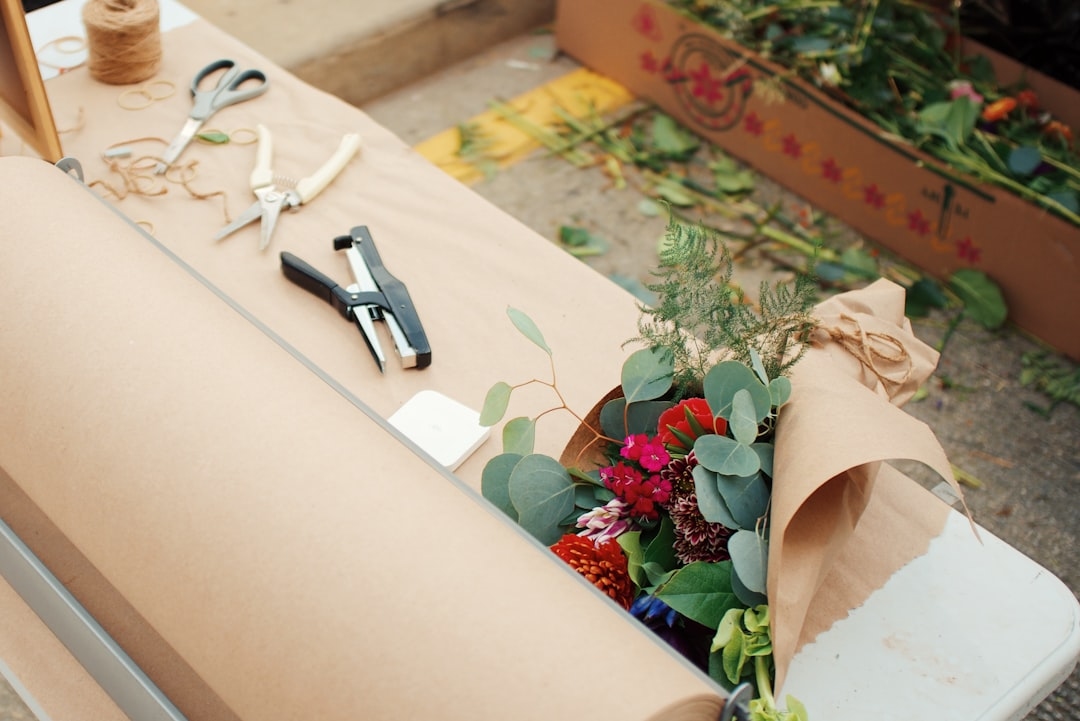
Best Materials for Wrapping Garden Flowers
The wrapping material you choose affects both the look and the longevity of the bouquet. Here’s a breakdown of the most practical options:
- Kraft paper: The most popular choice for a natural, artisan look. Inexpensive — a roll costs around $8–$12 — and it pairs beautifully with garden flowers. Not waterproof, so use a foil or plastic liner at the stem end.
- Tissue paper: Soft and elegant, especially in white or pastels. Layer two or three sheets for body. Works best for short transport times since it doesn’t hold up well when wet.
- Cellophane wrap: Clear plastic sheeting gives a professional florist look and is waterproof. A roll runs about $10–$15 and is reusable. Great as an outer layer over kraft or tissue.
- Burlap: A rustic, farmhouse-style option. Works well for thick-stemmed flowers like sunflowers and dahlias. Usually sold in strips or small rolls for under $6.
- Newspaper: An eco-friendly, vintage option that works surprisingly well. The ink on modern newsprint is generally soy-based and non-toxic, so it won’t harm stems.
“For garden-cut flowers, I always recommend layering — tissue on the inside to cushion the blooms, kraft on the outside for structure, and a foil cone at the base to hold a damp cotton pad against the stems,” says Margaret Holloway, certified florist and owner of Holloway Bloom Studio in Portland, Oregon. “That combination keeps stems hydrated for up to six hours, which covers most gifting scenarios.”
Step-by-Step: How to Wrap a Garden Bouquet
- Cut and condition first. Cut stems at a 45-degree angle and place them in cool water for at least one hour before wrapping. This step alone dramatically reduces wilting during transport.
- Remove lower foliage. Strip any leaves that will sit below the wrap line. Leaves in contact with moisture accelerate bacterial growth and shorten vase life.
- Assemble the bouquet. Arrange taller stems in the center and shorter or wider blooms toward the outside. Aim for an odd number of main focal flowers — 3, 5, or 7 — for a more natural, balanced look.
- Create a moisture base. Wrap the bottom 2–3 inches of stems in a damp paper towel, then cover tightly with aluminum foil or plastic wrap. This is your hydration reservoir.
- Wrap with your chosen paper. Lay paper diagonally, place the bouquet in the center, and fold up the sides. Angle the wrap so blooms are visible from the front. Secure with florist tape or ribbon at the stem point.
- Add finishing touches. A ribbon bow, a sprig of eucalyptus tucked into the paper, or a small card slipped into the wrap takes the whole thing up a notch.
Common Mistakes to Avoid
Even well-intentioned wrappers make these errors. Avoid them and your bouquet will look and last noticeably better.
- Wrapping too tight: Crushing petals against paper causes bruising within minutes. Leave at least an inch of breathing room around the blooms.
- Skipping the moisture step: Dry stems wrapped in paper will wilt in under two hours in warm weather. The damp paper towel + foil base is not optional for longer transport.
- Using the wrong paper size: Too small and you can’t create clean folds; too large and the wrap looks sloppy. A good general size is 18×24 inches for a medium bouquet.
- Mixing flowers with incompatible stem lengths: Extreme height differences make wrapping awkward and the bouquet structurally unstable. Trim stems to within 3–4 inches of each other before assembling.
- Forgetting to remove ethylene-producing flowers: Some flowers like daffodils emit ethylene gas that accelerates wilting in neighboring blooms. If you’re mixing varieties, keep daffodils separated or condition them alone for an hour first.
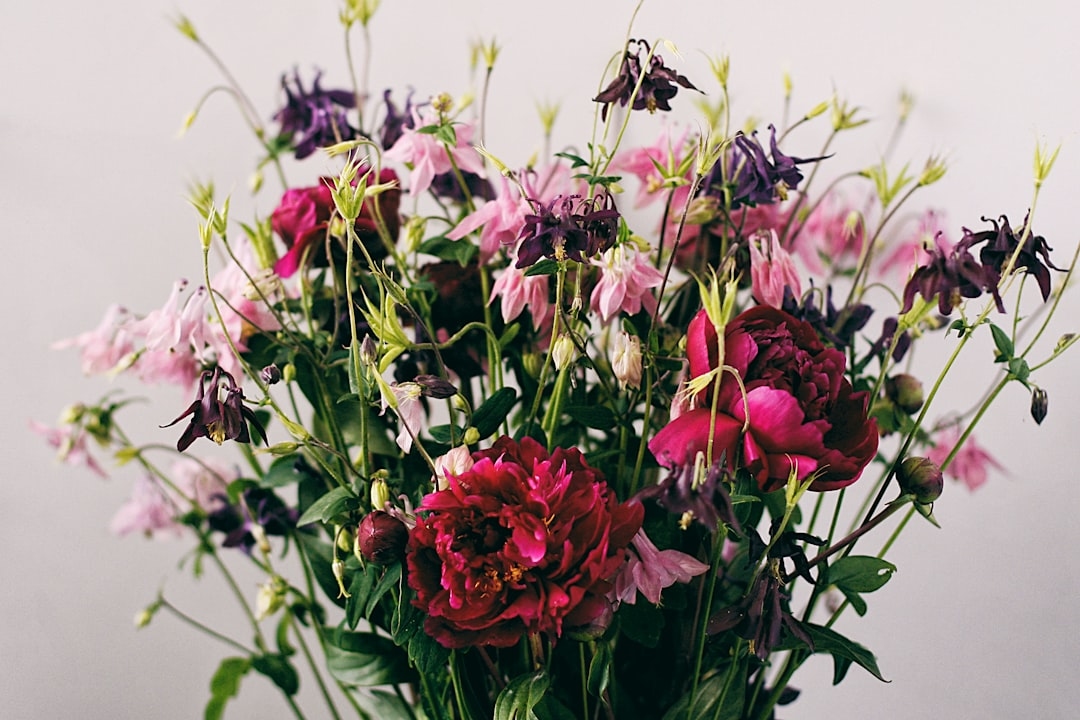
Color and Seasonal Pairings That Photograph Well
If the gift is being photographed — for a birthday post, a wedding, or just because — color coordination matters. Some combinations that consistently work well:
- Analogous palettes (colors next to each other on the color wheel): peach roses + coral zinnias + yellow marigolds. Warm and cohesive.
- Contrast pops: deep purple salvia + bright white shasta daisies. High visual impact, easy to grow together in USDA Zones 5–9.
- Monochromatic: all-white or all-pink arrangements feel elegant and intentional. Great for sympathy or formal occasions.
Adding 2–3 stems of green filler — fresh mint, lemon balm, or ornamental grasses from your garden — gives any bouquet body and makes it look more professionally composed without any extra cost.
Frequently Asked Questions
Do you have to wrap flowers when giving them as a gift?
No, wrapping is not required, but it significantly improves presentation and helps protect flowers during transport. For casual gifts, even a simple twist of twine is enough. For meaningful occasions, a proper wrap in kraft paper or tissue signals care and effort.
How do you keep garden flowers fresh when wrapped as a gift?
Wrap the bottom 2–3 inches of stems in a damp paper towel, then cover with aluminum foil or plastic wrap before adding decorative paper. This creates a moisture reservoir that can keep flowers fresh for 4–6 hours after cutting.
What is the best paper for wrapping garden flowers as a gift?
Kraft paper is the most versatile option — it’s inexpensive, durable, and looks great with garden flowers. Layer it over tissue paper for a fuller look, and add cellophane if you need waterproofing.
How early can you cut and wrap garden flowers before giving them?
Cut flowers 12–24 hours ahead, condition them in cool water, then wrap 1–2 hours before gifting. Avoid wrapping more than 2 hours in advance unless your wrap includes a proper moisture base and the bouquet is stored in a cool location (ideally under 65°F).
Is it okay to give flowers without a vase?
Yes — most recipients have a vase or can improvise with a mason jar or pitcher. If you want to include one, a simple glass cylinder vase from a craft store runs about $5–$8 and makes the gift feel complete. But a beautiful wrap is more than enough on its own.
Your Garden Deserves to Be Shared
Cutting flowers from your own garden to give someone is one of the most genuinely personal things you can do. All the hours you spent planting, watering, and watching those blooms develop — wrapping them thoughtfully is the last step in that process, not a separate task. It’s what transforms a handful of stems into a real gift.
Start simple: kraft paper, a damp towel at the base, a ribbon. Try it once and you’ll see how much of a difference it makes. From there, you can experiment with layering materials, adding filler greens, or matching your wrap color to the flowers. The more you do it, the faster and more natural it becomes — and your recipients will absolutely notice.
Next time you’re out in the garden with scissors in hand, bring a roll of kraft paper too. You’re already growing something worth giving.